Diamond painting is an increasingly popular leisure activity that is inspiring creative people all over the world. However, even if you don't need any previous knowledge for this DIY trend, painting with diamonds can be a challenge or two for beginners. To help you get started on your diamond painting adventure, we have put together the best basic tips for beginners in this blog. Whether you're a complete novice or just looking for a few useful tips, you'll find everything you need to know here. 


Getting the canvas flat
The canvas with your desired motif arrives at your home rolled and needs to be unrolled and flattened before you can start working. To do this, either lay the canvas on a flat surface overnight with the motif facing downwards and weigh it down with books or other objects. If you don't want to wait and want to get started straight away, you can also simply roll up your canvas in the opposite direction to prevent it from rolling back. However, this only works with canvases that are made with poured adhesive, like Carat Art canvases. Another way to smooth your canvas immediately is as follows: Peel off the transparent protective film from one corner to about the middle of the canvas and then smooth the film back onto the canvas (using a large ruler, for example). Repeat the process with the other three corners to reduce the tension on the canvas so that it lies flat again.Beginner-friendly picture size
If you have never tried Diamond Painting before, you should start with a smaller motif size (up to approx. 30 x 40 cm). Alternatively, you can also choose a craft kit with Diamond Painting stickers, where you don't have to complete a whole picture straight away. These types of craft kits are a good way to get a first impression of the principle of diamond painting. A diamond painting sticker set contains everything you need to get started straight away and by the time you have finished your first diamond painting sticker, you will have gained an impression of whether you enjoy this activity or not. The perfect workspace
When diamond painting, it is important to have a workstation where you have good lighting and can sit comfortably to protect your eyes and back. The chosen surface should be flat and also offer enough space to place the canvas and all the necessary utensils. It is best to lay out all the materials on a flat surface and make sure that everything is within easy reach.How and where to start the diamond painting
First, take your time to look at your canvas and decide which color you want to start with. If you are right-handed, it is best to start at the top left or bottom left, if you are left-handed, at one of the corners on the right-hand side. Each symbol in the picture stands for a specific color. A legend in the margin shows you which color is assigned to which symbol.Wax and tool pencil
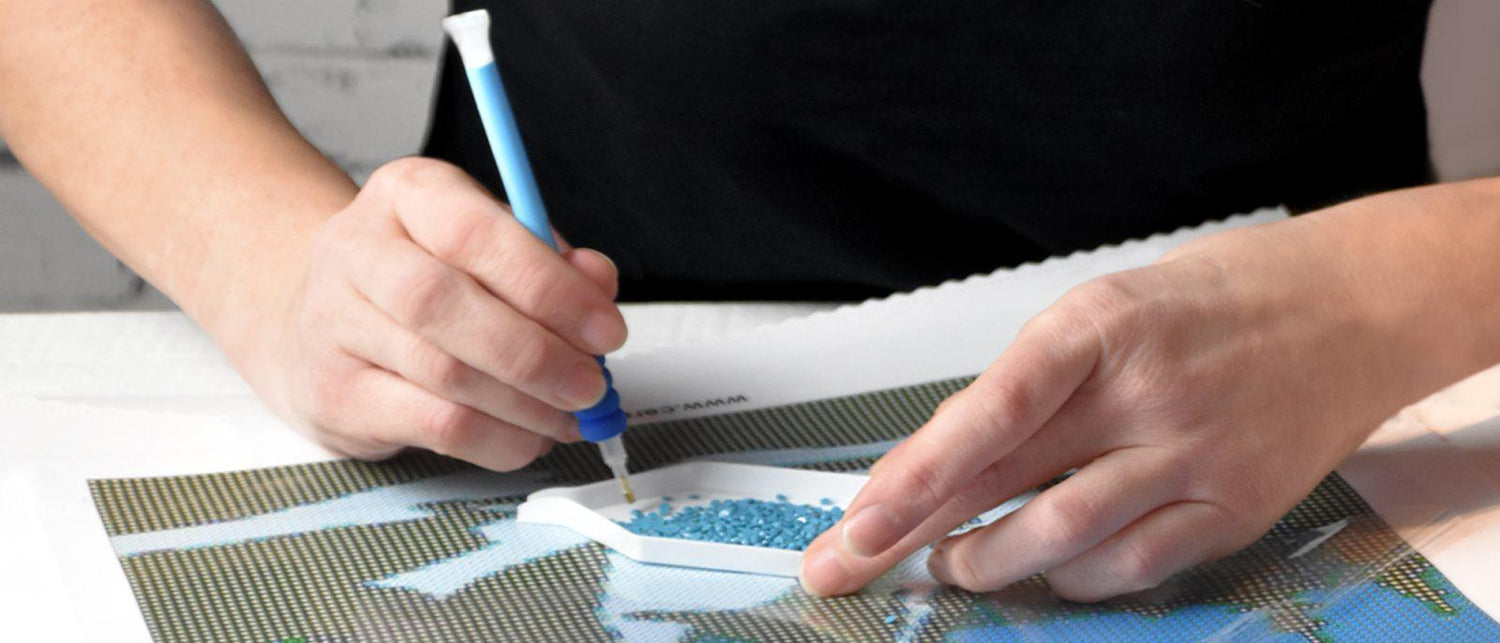
To be able to work properly with the tool pen, the cavity of the pen tip must first be filled with wax. To do this, the protective film must first be removed from the wax. Then press the tip of the tool pen into the wax. Then stick the protective film back onto the wax. From time to time, the pin must be pushed into the wax again so that the stones adhere well to it.Round or square stones?
Diamond Painting pictures can be purchased as sets with both round and square stones. The advantage of the round stones for beginners is that, unlike the square stones, they do not have to be glued with 100% precision, making it easier and quicker.Using the Diamond Painting bowl correctly
First pour a small amount of stones of the required color into the bowl. The grooves in the bottom of the bowl help to ensure that the stones are all lying flat on the bottom. To turn the wrong side of the stones to the right side, simply shake the bowl gently with light and quick left/right movements. This places the small stones in the correct position so that the faceted side is facing upwards and they can be picked up easily and without the hassle of turning them over.Separating stuck stones from each other
From time to time, the stones may have stuck together during production. To separate stones that have stuck together quickly and easily, simply place them in a bowl, place a second bowl of the same shape on top and carefully press the two bowls against each other or gently push the upper bowl back and forth. The now separated stones can then be processed as normal.The right light
To make it easier to distinguish the symbols on the canvas and the colors of the diamonds, you should make sure you have good lighting. One option is a bright table lamp, but even better is a light source underneath the canvas, which helps you to see the symbols even more clearly. A so-called Diamond Painting Light Pad makes it easier for you to work with the small stones and is easy on your eyes. Alternatively, you can also use a normal tablet.Don't panic if you place the stones incorrectly
Occasionally, you may position one or more stones incorrectly. Fortunately, these can be removed very easily with pointed Diamond Painting tweezers and then glued directly into the correct position.Working with baking paper
If you don't like the transparent protective film on your Diamond Painting or if it has been damaged or lost for some reason, you can also use coated baking paper to cover your Diamond Painting instead. You can also cut off smaller pieces of baking paper and place them on different areas of the painting so that they are protected and cannot be touched by hand when working, for example. However, it is important to note that it must be coated baking paper, as this can only be removed from the adhesive surface of the diamond painting without leaving any residue.How to handle the protective film correctly
Do not remove the upper transparent covering film of the canvas completely at once, as otherwise the adhesive layer on the canvas may dry out or dust, crumbs and hair may stick to it. Only ever expose a small area that you are currently working on and that you want to cover with diamond stones. As soon as you take a break or want to finish your work temporarily, the protective film should always be placed over the entire canvas again.Finishing the diamond painting
When your picture is finished, you should also press the stones down again to fix any loose diamond stones. To do this, place the transparent protective film or, if this is no longer available or has been cut up, a piece of baking paper on the picture again and then roll over it with a rolling pin. If you don't have a rolling pin or don't want to use one, you can also use a special Diamond Painting Roller. After this procedure, your stones are firmly attached to the canvas and your diamond painting is finished. Now you can frame it and decorate your home with it!Simply straight rows
You can use a ruler not only to draw straight lines - you can also use it as an aid for straight stone lines in diamond painting. To ensure that the first row at the edge of your motif in particular is neat and straight, you can place a ruler on the outer edge of the motif before placing the stones and then press the stones briefly towards the ruler as you place them. When the first row is finished, carefully remove the ruler again. You can do the same on the opposite edge and on the sides. You can also use a Diamond Painting corrector to help you, with which you can simply push the stones into neat and straight rows even after they have been set.Static Diamond Painting stones
The stones can become statically charged due to the movement in the bags. As a result, they are sometimes difficult to fill into the bowls and difficult to pick up with the pen. There is a simple trick to prevent this. Cut off small pieces of dryer sheet, place one in each sachet and then shake the sachet gently. This creates an anti-static effect and the stones no longer stick to each other, but only to the designated spot on the canvas. 19459Storage for in between
If you don't have a dedicated workspace for your diamond painting hobby and therefore work at the dining or living room table, the canvas will inevitably have to be put away again and again. This is often not so easy, especially with larger paintings, as they should ideally always lie flat so that you can continue working on them straight away. This means that you also need a larger surface for temporary storage. If you don't have a suitable surface, you can use a trouser hanger with clips and hang your picture vertically to save space. This way, the canvas is not in the way, can be moved to the side at any time and still remains nice and smooth.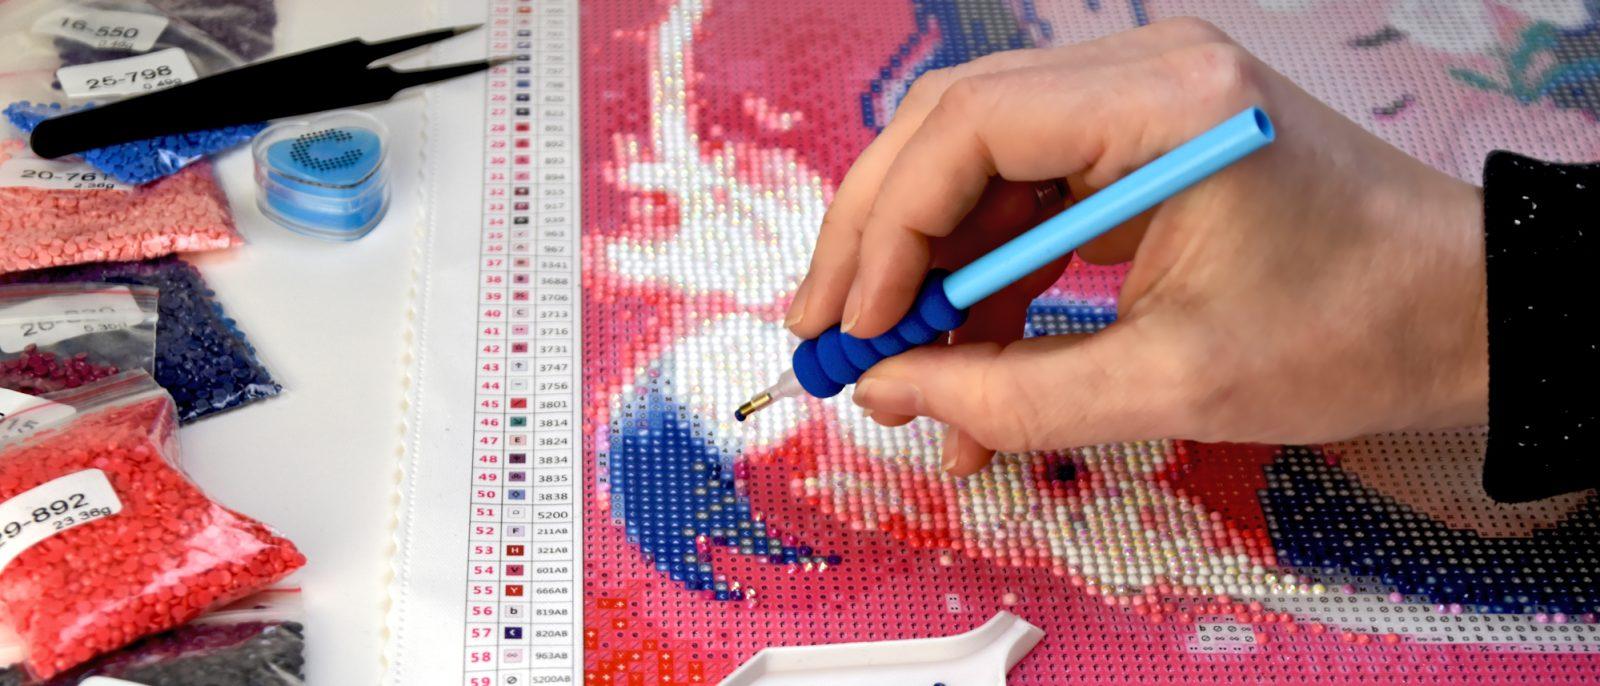
Leave a comment
All comments are moderated before being published.
This site is protected by hCaptcha and the hCaptcha Privacy Policy and Terms of Service apply.